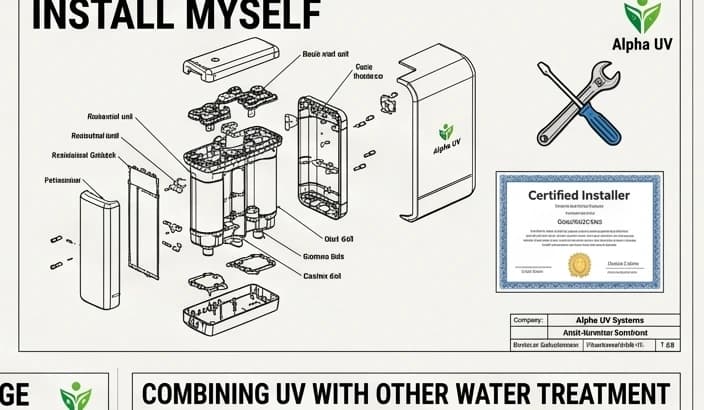
Quick Answer: Can I Install a UV Water System Myself?
Yes — for the vast majority of residential UV water systems in India, self-installation is practical, safe, and takes 30–60 minutes for anyone comfortable with basic plumbing. If you can cut a pipe and tighten a fitting, you can install a UV water system yourself. The electrical connection is simply a standard 230V three-pin plug — no licensed electrician is required for a domestic residential installation.
A UV water system DIY installation is not only permitted, it is the normal installation route for residential units sold across Delhi NCR, Mumbai apartments, and Bangalore flats. Unlike RO systems that require membrane connections and waste drain lines, a UV purifier connects inline on your existing supply pipe at a single cut point. That is the entirety of the plumbing work.
The key prerequisites: you need to be able to close a shut-off valve, cut a supply pipe at the correct point, and connect standard BSP fittings with PTFE tape. If your supply pipe is GI (galvanised iron) or your installation requires significant pipe rerouting, those two scenarios may warrant a plumber — more on that below.
Can You DIY or Should You Call a Plumber? Decision Framework
The decision to self-install a UV water system depends on four factors: your pipe type, the system's flow-rate class, where in the plumbing system the installation point sits, and your own plumbing confidence. The table below is the fastest way to assess which category your installation falls into.
| Factor | DIY Appropriate | Call a Plumber |
|---|---|---|
| Pipe material | CPVC, uPVC, copper, flexible braided | GI (galvanised iron) or MS — requires threading dies or a pipe vice |
| System size (flow rate) | 100–2,000 LPH residential units | 5,000 LPH and above — heavy chambers, flanged connections |
| Installation point accessibility | Under sink, visible overhead tank outlet, exposed mains entry | Concealed pipe runs, inside false ceiling, behind tiled walls |
| Building type | Apartment flat, independent house, villa | Commercial kitchen, factory, institutional building with dedicated plumbing schematics |
| Plumbing experience | Can change a tap washer, has used PTFE tape before | Never touched a supply pipe, unsure how to close a shut-off valve |
| Pre-filter requirement | Transparent sediment filter housing — straightforward to add inline | Multiple pre-treatment stages (iron removal, softener, carbon) in sequence |
| Pipe rerouting needed | Straight inline cut, no rerouting required | Installation requires extending the pipe run by more than 50 cm |
| Borewell supply with high iron | If iron removal filter is already installed upstream | Raw borewell supply with high turbidity — water quality pre-treatment required first |
If all your answers fall in the left column, you can install a UV water system yourself with confidence. If two or more factors fall in the right column, a local plumber for a one-hour job is worthwhile to avoid leaks or incorrect installation.
Tools You Will Need for UV System Self Installation
A UV water system DIY installation requires no specialist tools beyond what most Indian homes have or can source locally for under Rs 500. Here is what you need and where to find it if you do not already have it.
- Pipe cutter or mini hacksaw: A ratchet pipe cutter (Rs 150–300, available at any hardware store in Delhi NCR, Mumbai, and Bangalore) is the cleanest option for CPVC and copper. A standard hacksaw works for all pipe types. Ensure the blade is in good condition — a dull blade drags and can crack CPVC.
- Two adjustable spanners: One to hold the UV chamber fitting steady while the other tightens the supply pipe fitting against it. Do not use a single spanner — it puts torque stress on the UV chamber itself. Available at any hardware store (Rs 200–400 for a pair of 200mm spanners).
- PTFE (Teflon) thread seal tape: Essential for leak-free BSP threaded connections. Use a minimum of 3–4 wraps on external threads, applied in the direction of thread rotation (clockwise when looking at the male thread face-on). Rs 20–40 per roll at any plumbing or hardware shop in India.
- Drill with masonry bits: Needed if mounting the UV unit on a wall bracket. A standard 6mm masonry bit for rawl plugs. Most Indian homes have a drill or can borrow one. Alternatively, a plumber can be asked to drill the anchor holes as a small add-on to any other job.
- Bucket and old cloth: To catch water from the pipe when you cut it. Even with the shut-off valve closed, there is typically 200–500 ml of residual water in the pipe section between the valve and cut point.
- Deburring tool or fine file: To smooth the cut ends of the supply pipe so the fittings seat properly. A half-round file (Rs 50–80) from any hardware shop works fine.
What Comes in the Box: UV System Box Contents Checklist
Before you start a UV water system self installation, open the box and verify that all components are present and undamaged. This table covers what is included in a standard residential UV system and what to check for each item before starting.
| Item | What It Does | What to Check Before Starting |
|---|---|---|
| UV chamber (stainless steel body) | The vessel through which water flows and is exposed to UV-C light | Inspect for dents, check inlet and outlet port threads are undamaged, verify directional flow arrow is visible |
| UV lamp (Philips UV-C lamp or Philips TUV) | Emits UV-C radiation at 254 nm that inactivates pathogens in the flowing water | Check the lamp is not cracked. Do not touch glass surface with bare hands |
| Quartz sleeve | Protects the UV lamp from direct water contact while transmitting UV-C light at high efficiency | Hold up to light to confirm it is clear, unscratched, and free of internal moisture — any cloudiness indicates a damaged sleeve |
| Inlet and outlet fittings (union connectors) | Connect the UV chamber to your supply pipe | Verify thread size matches your supply pipe — standard Indian residential is 1/2" or 3/4" BSP |
| Wall mounting bracket | Secures the UV unit vertically or horizontally to a wall or cabinet | Check bracket screws are included. Confirm it matches the chamber diameter |
| Ballast / power supply unit | Regulates electrical current to the UV lamp for stable output | Check the power cord is intact, the plug is 230V Indian standard, and the UV intensity indicator light is functional (test dry before water connection) |
| O-ring seals (end caps) | Seal the lamp end caps to the chamber body to prevent water ingress | Check O-rings are seated correctly in their grooves and are not twisted or pinched — a misseated O-ring causes the most common post-installation leaks |
| User manual | Model-specific installation instructions, flow rate specifications, lamp replacement schedule | Confirm the manual matches your purchased model number. Look for the rated flow rate (LPH) and maximum operating pressure before starting |
Step-by-Step: How to Install a UV Water System Yourself (8 Steps)
This UV system installation guide covers the full process from selecting your installation point through first power-on. Follow each step in order — skipping steps, particularly pre-filtration and the lamp handling rules, causes the most common post-installation problems.
Step 1: Choose the Installation Point
Where you install the UV system determines what water it treats. There are four main options in Indian homes. The installation point comparison table later in this guide covers each in detail, but the practical decision for most residential installations comes down to two options: under the kitchen sink (treats kitchen tap water only) or at the overhead tank outlet (treats all water in the flat or house).
For Delhi NCR and North India borewell supply, the most common setup is: mains supply in → sediment filter → UV system → overhead tank. This protects the stored tank water from re-contamination during tank residence time. For Mumbai and Bangalore apartments on municipal supply, under-sink installation at the kitchen tap is the simplest and most common approach.
The UV unit must be installed so the lamp orientation (vertical or horizontal) matches the manufacturer's specification for your model — always confirm this in the product manual before mounting the bracket. Installing a vertical-only unit horizontally can result in inadequate contact time and under-dosing.
Step 2: Turn Off the Water Supply
Locate the shut-off valve for the pipe section where you will install the UV system. In Indian apartments this is typically either under the kitchen sink or at the main supply valve for the flat. Close the valve completely. Open the tap or fixture downstream of the cut point to release line pressure and drain residual water from the pipe. Place a bucket under the area where you will cut.
If you are installing at the overhead tank outlet in a residential building, close the ball valve at the tank outlet. Check that no water flows from the tap downstream before cutting. If water continues to flow, locate the upstream valve — there may be a second feed you have not closed.
Step 3: Fit the Sediment Pre-Filter (5-Micron)
This is the step most first-time UV water system DIY installers skip, and it is the most consequential omission. UV-C light cannot penetrate turbid water. Particles, suspended solids, and iron precipitates in the water create shadows behind which bacteria can pass through the UV chamber without receiving adequate UV dose.
Before installing the UV system, install a 5-micron sediment filter inline on the same supply pipe, upstream of the UV chamber. Sediment filter housings are available at any plumbing supplier in India for Rs 400–800 for the housing plus Rs 80–150 per replacement cartridge. The connection is identical to the UV unit itself — an inline cut, PTFE tape on the threads, and two union fittings.
For municipal supply in cities like Bangalore and Mumbai, a 5-micron sediment filter is usually sufficient as pre-treatment. For borewell supply in North India with higher turbidity and iron content, a 25-micron pre-filter followed by a 5-micron filter before the UV unit is the recommended sequence.
Step 4: Cut the Supply Pipe
Measure the length of the UV chamber plus fittings to confirm how much pipe you need to remove to create the gap for the UV unit. Mark both cut points on the supply pipe. Cut cleanly and squarely — an angled cut means the fitting will not seat correctly on the pipe end.
For CPVC pipe (the orange-brown pipe common in Indian residential construction since the 2010s), use a ratchet pipe cutter — it gives a clean perpendicular cut with no pipe deformation. For older GI or MS pipe, a hacksaw with a fine-tooth blade is required. After cutting, use a deburring tool or file to smooth all cut edges to remove any burrs that could damage O-rings in the fitting assembly.
Step 5: Connect Inlet and Outlet Fittings (BSP, PTFE Tape, Torque)
Most residential UV systems in India supply union fittings with BSP (British Standard Pipe) threads — the standard thread form for Indian plumbing. NPT (National Pipe Thread, the US standard) is not compatible and requires an adapter if your fittings are from an imported system not sold through Indian distribution.
Apply PTFE tape to the male thread: 3–4 wraps for 1/2" BSP, 4–5 wraps for 3/4" BSP. Wrap in the direction of thread rotation (clockwise when you are looking at the end of the male fitting). Wrapping in the wrong direction causes the tape to unravel as you thread the fitting on.
Check the directional flow arrow on the UV chamber body. Connect the inlet fitting to the supply side (water flowing in) and the outlet fitting to the pipe running to your tap or tank. Hand-tighten both fittings first, then use two spanners to tighten — one holding the chamber fitting steady, one turning the supply pipe fitting. One to one-and-a-half turns past hand-tight with PTFE tape applied is the correct torque for stainless steel BSP fittings. Do not overtighten — excessive torque can crack the threaded boss on the stainless steel chamber inlet, a damage that is not repairable in the field.
Step 6: Mount the UV Unit (Vertical and Horizontal Orientation)
Mark the wall position for the mounting bracket so the UV chamber aligns with the pipe connections you have just made. For under-sink installation in Indian kitchens, the bracket typically mounts on the cabinet side wall. For overhead tank outlet installations, the bracket mounts on the wall adjacent to the tank outlet pipe.
Drill the bracket anchor holes (typically 6mm for standard rawl plugs in Indian brick or concrete walls). Insert rawl plugs, secure the bracket with the supplied screws, and hang or clip the UV chamber onto the bracket. Confirm the chamber is secure — the chamber must not move or vibrate during operation or during the annual lamp replacement procedure.
Ensure at least 20–25 cm of clear access above (or below, depending on model) the chamber end cap for the annual UV lamp replacement. Insufficient clearance means you cannot remove the lamp without dismounting the unit entirely each year.
Step 7: Install the UV Lamp (Quartz Sleeve Handling — Bare-Hand Rule)
If the UV lamp is not pre-installed in the chamber (some residential units ship with the lamp separately packed to protect it during transit), you will need to install it now. This step has one absolute rule: do not touch the quartz sleeve or the UV lamp glass surface with bare hands at any point.
The oils from skin leave invisible deposits on the quartz surface. These deposits absorb UV-C energy and create permanent dark spots that reduce lamp output — a problem that cannot be cleaned off once the lamp has operated. Use clean cotton gloves or handle the lamp and sleeve through the plastic packaging it came in.
To install: remove the lamp end cap from the chamber (the cap at the top or bottom depending on model). If the quartz sleeve is separate, slide it carefully into the chamber — the quartz is fragile and will crack if it contacts the stainless steel chamber wall forcefully. Once the quartz sleeve is seated, insert the UV lamp into the sleeve. Connect the lamp lead to the ballast connector. Replace the end cap and tighten firmly by hand — do not use tools on the end cap, which is typically plastic or anodised aluminium and will crack under spanner torque.
Verify the O-ring on the end cap is properly seated in its groove before replacing the cap. A misaligned O-ring is the single most common cause of water leakage at the lamp end after installation.
Step 8: Restore Water Supply and Power On — Confirm Operation
Slowly open the shut-off valve — not all at once. Open it gradually over 5–10 seconds to avoid water hammer pressure spikes on the new fittings. With water running, inspect all four connection points: inlet fitting, outlet fitting, and both end caps of the UV chamber. Look closely — a slow drip may not be immediately visible, so run your finger around each connection point to feel for moisture.
If a fitting drips under pressure, close the valve again, drain the pipe, and re-tighten the fitting by a quarter turn. If re-tightening does not resolve the leak, disassemble, remove the PTFE tape, re-tape with additional wraps, and reconnect. Do not attempt to tighten a fitting while water is running under pressure — this will not seal a leak and risks cracking the fitting.
Once all connections are confirmed leak-free, plug in the UV system power supply. The UV intensity indicator should illuminate — typically a green LED or a numerical UV output display. Allow the system to run for 2–3 minutes before drawing water. This stabilises the lamp temperature (UV-C output from a cold lamp increases over the first 2 minutes of operation). Run water from the downstream tap for 1 minute to flush air from the UV chamber and any residual manufacturing assembly fluid from the new quartz sleeve before drinking.
Installation Point Comparison
Where you install a UV system in your home determines what water it treats and what capacity you need. This table covers the four main installation points used in Indian residential and light commercial setups.
| Installation Point | What It Treats | Pros | Cons | UV Capacity Needed |
|---|---|---|---|---|
| Under-sink (kitchen tap) | Kitchen drinking and cooking water only | Simplest installation; lowest cost; easiest lamp access; no effect on bathroom/utility supply needed | Does not treat bathroom supply; water for other uses is untreated | 100–500 LPH for 2–6 person household |
| Overhead tank outlet | All water distributed from the storage tank throughout the flat | Treats all outlets including bathroom; protects against tank re-contamination during storage; standard setup for North India borewell supply | Higher capacity UV system required; gravity-fed tanks have low pressure — ensure UV system works at low inlet pressure (typically 0.3–5 bar) | 1,000–3,000 LPH depending on number of outlets and household size |
| Mains entry (whole-house point of entry) | All water entering the building before any storage | Maximum protection; treats all water before storage — tank cannot become a re-contamination source | Must handle full mains flow rate; requires larger UV system; mains shut-off access required during installation | 3,000–10,000 LPH depending on building size and simultaneous demand |
| Pre-RO (before RO membrane unit) | Feed water to the RO system — reduces biological load on the RO membrane | Extends RO membrane life significantly; reduces biofouling on the membrane; improves RO output water quality | Low flow rate (RO systems draw 100–300 LPH); does not treat distributed water — only protects the RO system | 100–300 LPH — a small residential UV unit is sufficient |
Common DIY Mistakes and How to Avoid Them
These are the eight most frequent errors made during a UV water system self installation in India. Each is avoidable with the right preparation.
Installation Mistakes — Cause and Fix
| Mistake | Why It Happens | Consequence | How to Avoid |
|---|---|---|---|
| Installing the UV chamber backwards (outlet connected to supply) | Flow arrow on chamber not noticed; inlet and outlet look identical | Water bypasses the maximum UV exposure zone — receives reduced dose; contamination risk | Always locate the flow arrow on the chamber body before connecting. Mark it with a marker pen if needed. Inlet is always the port where water enters from the supply side |
| Skipping the sediment pre-filter | Not included in the UV system box; often not mentioned at point of sale | Turbid water blocks UV-C penetration — pathogens in the shadow of particles pass through undosed | Always install a 5-micron sediment filter upstream of any UV system. Purchase separately if not bundled. Budget Rs 500–1,000 for housing and initial cartridge |
| Touching the quartz sleeve or lamp glass with bare hands | Installer unfamiliar with the bare-hand rule; gloves not to hand | Skin oil deposits absorb UV-C; permanent dark spots on quartz reduce output — cannot be cleaned | Handle through packaging or use clean cotton gloves. Keep gloves in the box for the annual lamp replacement too |
| Overtightening BSP fittings | Assumption that tighter means better seal | Cracks the threaded inlet/outlet boss on the stainless steel chamber — unrepairable in field; must replace chamber | PTFE tape on threads, hand-tight plus one to one-and-a-half turns with spanner. Stop as soon as resistance increases significantly |
| Installing a UV system undersized for the actual flow rate | Buyer selects on price rather than LPH rating; does not calculate peak demand | Water flows through the chamber faster than the rated exposure time — under-dosed; contamination risk at peak flow | Calculate peak demand before purchase: number of simultaneously open outlets multiplied by typical tap flow rate. A 4-member household in a 2BHK typically needs 1,000–2,000 LPH for overhead tank outlet installation |
| Misseating the end cap O-ring | O-ring displaced during lamp installation; not checked before cap replacement | Slow water leak at the lamp end cap that worsens over time and can damage the ballast if water contacts the lamp connector | Before replacing the end cap, visually confirm the O-ring is fully seated in its groove and not twisted or pinched. Press the O-ring into the groove at four points around the circumference |
| No clearance for annual lamp removal | UV unit mounted without considering the lamp extraction path | Lamp cannot be removed without dismounting the entire unit each year — often results in lamp not being replaced on schedule | Before drilling mounting holes, extend the lamp fully in the extraction direction and confirm 20–25 cm of clear space. On under-sink installations, check the cabinet interior height with the lamp extended |
| Using NPT fittings on BSP-threaded UV ports | Imported UV system or fittings sourced from a hardware store selling NPT stock | NPT and BSP threads are similar in pitch but not interchangeable — the joint appears to tighten but leaks under pressure and can cross-thread and damage the port | Confirm the UV system uses BSP threads (standard in all Indian-market UV systems). If sourcing adapters separately, buy explicitly BSP-specified fittings. When in doubt, ask the supplier to confirm thread standard before purchase |
Indian Plumbing Specifics: Pipe Types and UV Fitting Compatibility
Indian residential plumbing uses several pipe materials depending on the age of construction and the region. Not all pipe types are equally straightforward for a UV water system DIY installation. The table below maps each common pipe type to its UV fitting compatibility.
| Pipe Material | Common Use in India | Fitting Type | DIY Compatible? | Notes |
|---|---|---|---|---|
| CPVC (chlorinated PVC, orange-brown) | New construction since 2010 — most Bangalore flats, newer Mumbai and Delhi NCR apartments | BSP threaded brass inserts solvent-welded to CPVC; or CPVC compression fittings | Yes — easiest DIY pipe type | Cut with a ratchet cutter, deburr, and use threaded brass-to-BSP adapter to connect to UV unit fittings. Do not use PVC solvent cement directly on UV chamber threads |
| uPVC (unplasticised PVC, grey or white) | Overhead water supply lines, some older apartment plumbing across India | BSP compression fittings or solvent-weld with threaded adapter | Yes — manageable DIY | Compression fittings are preferable for DIY over solvent-weld as they are reversible. Do not overtighten — uPVC is more brittle than CPVC |
| Copper | Premium construction, older colonial-era buildings in Mumbai and Delhi, some bungalows | Compression fittings or solder-end fittings with BSP adapter | Yes — if using compression fittings (no soldering required) | Compression fittings on copper are a clean DIY connection. Avoid solder connections unless experienced — incorrect solder joints on a pressurised water line leak after days of settling |
| GI (galvanised iron) | Construction before 1995 — common in older Delhi NCR housing colonies, older Mumbai chawls, older Bangalore layouts | NPT-to-BSP adapter (GI pipe uses tapered NPT threads in Indian practice) or cut-and-thread with die set | Not recommended for DIY | Cutting GI pipe requires a hacksaw and threading the cut end requires a die set and pipe vice. GI is also prone to internal rust that increases turbidity — if you have GI supply pipe, consider an iron removal pre-filter before the UV system |
| Flexible braided supply hose | Under-sink final connection to tap; common in kitchen and bathroom in all modern Indian construction | Push-fit or compression fitting with BSP male end | Yes — simplest connection of all | Flexible braided hose can be disconnected and a UV unit tee-inserted using a Y-adapter or inline tee. No pipe cutting required if the hose has enough slack |
| MS (mild steel, black pipe) | Industrial premises, older commercial buildings, some agricultural borewell supply lines | Requires threading die and pipe vice | Not recommended for DIY | MS pipe installation requires tools not normally found in a home toolkit. For any MS pipe installation, engage a plumber experienced in industrial pipework. This is also the scenario where a commercial UV system with flanged connections may be appropriate |
Post-Installation: First Week Checks
Even a perfectly executed UV water system self installation requires monitoring in the first week as connections settle under water pressure and thermal cycles.
- 24-hour check: With the system running, inspect all connection points again after 24 hours. Connections that were dry at first pressurisation sometimes develop slow drips as the PTFE tape compresses and the pipe settles at operating temperature. A drip at this stage needs one-quarter turn additional tightening at most.
- UV intensity indicator: The UV intensity indicator on the ballast should remain continuously illuminated during all water use. If the indicator flickers or extinguishes during operation, this indicates a lamp, ballast, or loose lamp connector issue — do not use the water and check the lamp connection first.
- Check for vibration noise: A UV lamp that rattles during water flow indicates the lamp is not fully seated in the quartz sleeve, or the quartz sleeve is not fully seated in the chamber end cap. Turn off power, drain, and reseat the components.
- Water taste check: UV treatment adds no taste, odour, or chemicals to water. If treated water tastes different from before, it is usually a new quartz sleeve manufacturing residue — run the system for 30 minutes with continuous flow to flush it. If the taste persists after flushing, it is typically a pre-existing water quality issue unrelated to the UV system.
- Set replacement reminder: Record the installation date. The Philips UV-C lamp or Philips TUV lamp used in most Indian-market residential UV systems is rated for 9,000 operating hours. At 12 hours per day of operation (typical for a household with overhead tank pump cycles), this equals approximately 24 months. Set a reminder accordingly. Annual replacement is conservative and correct practice for drinking water systems regardless of stated lamp life.
Annual UV Lamp Replacement: Also a DIY Job
The annual UV lamp replacement is the one maintenance task every UV water system requires, and it is just as much a DIY job as the original installation — arguably simpler, since the pipe connections are already done. You only need to replace the UV lamp (and optionally clean the quartz sleeve) once per year.
| Step | Action | Safety Note | Time Required |
|---|---|---|---|
| 1 | Turn off the UV system power at the socket. Do not just turn off at the UV controller — unplug completely. | Wait 5 minutes for the lamp to cool before handling — UV-C lamps operate at elevated temperature | 5 minutes (waiting) |
| 2 | Close the water supply shut-off valve. This prevents water flow through the chamber while the end cap is open. | Do not open the end cap under water pressure — water will flow out of the lamp end | 1 minute |
| 3 | Disconnect the lamp lead from the ballast connector. Unscrew the end cap by hand. Remove the old UV lamp from the quartz sleeve carefully. | Do not touch the quartz sleeve with bare hands during this step — use gloves. Dispose of the old UV lamp as per electronic waste guidelines (UV lamps contain a small amount of mercury) | 5 minutes |
| 4 | Inspect the quartz sleeve. If cloudy, discoloured, or has visible deposits, clean with a clean cloth lightly dampened with isopropyl alcohol (IPA), or replace the sleeve entirely. | Handle the quartz sleeve with gloves throughout. A cracked quartz sleeve must be replaced immediately — do not operate the system with a damaged sleeve | 5–10 minutes |
| 5 | Insert the new Philips UV-C lamp or Philips TUV lamp into the quartz sleeve using gloves. Connect the lamp lead. Check the end cap O-ring is correctly seated. Replace and hand-tighten the end cap. | Do not use tools on the end cap — hand-tight is correct. Overtightening cracks the cap | 5 minutes |
| 6 | Open the water supply shut-off valve. Plug in and power on the UV system. Confirm the UV intensity indicator illuminates. Check end cap for any water drips. | If the UV intensity indicator does not illuminate after lamp replacement, check the lamp connector seating and ballast connection before concluding the lamp is faulty | 5 minutes |
The entire annual UV lamp replacement procedure takes 20–30 minutes including the cooling wait time. Replacement Philips UV-C lamps for most residential Indian UV systems are available from the original UV system supplier and from electrical component distributors in any major Indian city.
When to Call Alpha UV System: Commercial and Industrial Installation Support
For residential UV water system DIY installation on standard CPVC or uPVC pipe with a residential-class unit (100–2,000 LPH), the guide above is everything you need. However, for the following scenarios, Alpha UV System's installation support is available with a 24–48 hour response:
- Commercial kitchens and restaurant chains: Flow rate calculation for multi-outlet commercial kitchens, flanged connection installation for high-capacity units, FSSAI-compliant documentation of UV treatment as part of the water treatment log
- Industrial borewell supply: Complete water quality assessment, pre-treatment sequencing (iron removal, softening, sediment), and UV system sizing for high-TDS or high-iron borewell supply common across North India and parts of Karnataka and Telangana
- Multi-storey residential buildings: Rooftop tank treatment system design, flow balancing across floors, and documentation for builder compliance
- Hospital and institutional supply: High-output UV system installation with redundancy, 254 nm dose verification, and maintenance contract terms
For all commercial and industrial UV system installations, our team provides a 24–48 hour response for on-site assessment across North India, and supply with installation is available for customers in other regions through our distributor network.
Frequently Asked Questions
Do I need a plumber to install a residential UV system?
No, not for most residential installations. If you can install a UV water system yourself on CPVC or uPVC pipe — which describes most Indian homes built after 2000 — no plumber is needed. The UV system connects inline using standard BSP fittings and PTFE tape. The only scenario where a plumber is genuinely needed is GI pipe (which requires threading tools), or where the installation requires significant pipe rerouting. For a straightforward under-sink or overhead tank outlet installation, this is a 30–60 minute DIY job.
How long does self-installation take?
30–60 minutes for a first-time UV system self installation in a standard under-sink or overhead tank outlet location on CPVC or uPVC pipe. Allow 90 minutes if you are installing a sediment pre-filter at the same time (which you should). Installing on copper pipe with compression fittings adds 15–20 minutes. Budget 2 hours total for your first installation including unpacking, reading the manual, gathering tools, and the post-installation leak check. Subsequent installations — or the annual lamp replacement — take 20–30 minutes once you are familiar with the components.
Do I need an electrician for the UV system electrical connection?
No. Every residential UV water system sold in the Indian market connects via a standard 230V, 3-pin Indian plug to a standard wall socket. The ballast (power supply unit) is sealed and pre-wired from the factory — no wiring work is required at installation. The only electrical requirement is a nearby socket within reach of the power cord (typically 1.5 m). An extension lead is acceptable if a socket is not immediately adjacent. No licensed electrician is required for residential UV system installation.
Can I install a UV system on PVC or CPVC pipes?
Yes, and this is the most common UV water system DIY installation scenario in India. CPVC pipe (the orange-brown pipe in most construction post-2010) and uPVC pipe (grey or white) both accept standard BSP threaded brass fittings. Cut the pipe with a ratchet cutter, deburr the cut end, and connect with a BSP-to-CPVC or BSP-to-uPVC adapter using PTFE tape. Do not overtighten plastic fittings — one turn past hand-tight with PTFE tape applied is sufficient. Using compression fittings rather than solvent-weld adapters is recommended for DIY, as compression fittings are reversible if you need to re-route or adjust.
What flow rate UV system do I need for my home?
The correct sizing depends on your installation point and household size. For an under-sink kitchen tap installation: 100–300 LPH is adequate for a 2–4 person household at typical Indian kitchen tap flow rates. For an overhead tank outlet treating all water in a flat: a 3–4 member household in a standard 2BHK apartment needs 1,000–2,000 LPH to handle peak morning demand when multiple taps are open simultaneously. For a whole-house mains entry point in an independent bungalow: 3,000–5,000 LPH depending on the number of bathrooms and outlets. If you are unsure, calculate: number of outlets likely to be open simultaneously multiplied by 10–12 litres per minute (standard Indian tap flow rate) gives you the peak LPH demand your UV system must handle without under-dosing.
Can I replace the UV lamp myself or do I need a technician?
You can replace the UV lamp yourself. UV lamp replacement is as much a DIY job as the original installation — it requires no pipe work, only the lamp end cap removal, lamp swap with gloves, and power-on confirmation. The only rule is the same as installation: do not touch the new lamp glass or quartz sleeve with bare hands. A replacement Philips UV-C lamp or Philips TUV lamp for a residential system takes 20–30 minutes to replace including the cooling wait time after turning off the system. No tools are required beyond clean gloves. Replacement lamps are available from Alpha UV System and from electrical component distributors across India.
Ready to install your UV water system, or need help choosing the right system for your home? WhatsApp our team — we will confirm your pipe type, recommend the correct UV capacity for your household, and walk you through any installation question within 24–48 hours.
Standards, authorities & further reading
External references used to inform this guide. Regulations evolve — check the latest revision on each authority's site before compliance decisions.
Recommended UV Systems
Alpha UV System products for this application — powered by genuine Philips UV-C lamps.
Commercial UV Water Purification System
500 – 5,000 LPH
HACCP-compliant UV water purification for hotels, restaurants, and offices
Industrial UV Water Treatment System
5,000 – 50,000 LPH
Schedule M 2025 and HACCP compliant UV for pharma, food & beverage, and process water
Not sure which system suits your application? WhatsApp our engineers for a free recommendation →
Need a UV system?
Talk to our UV engineers — WhatsApp for a quote in 2 hours, or browse the full catalog on IndiaMART.