Quick Answer: UV Water System Installation
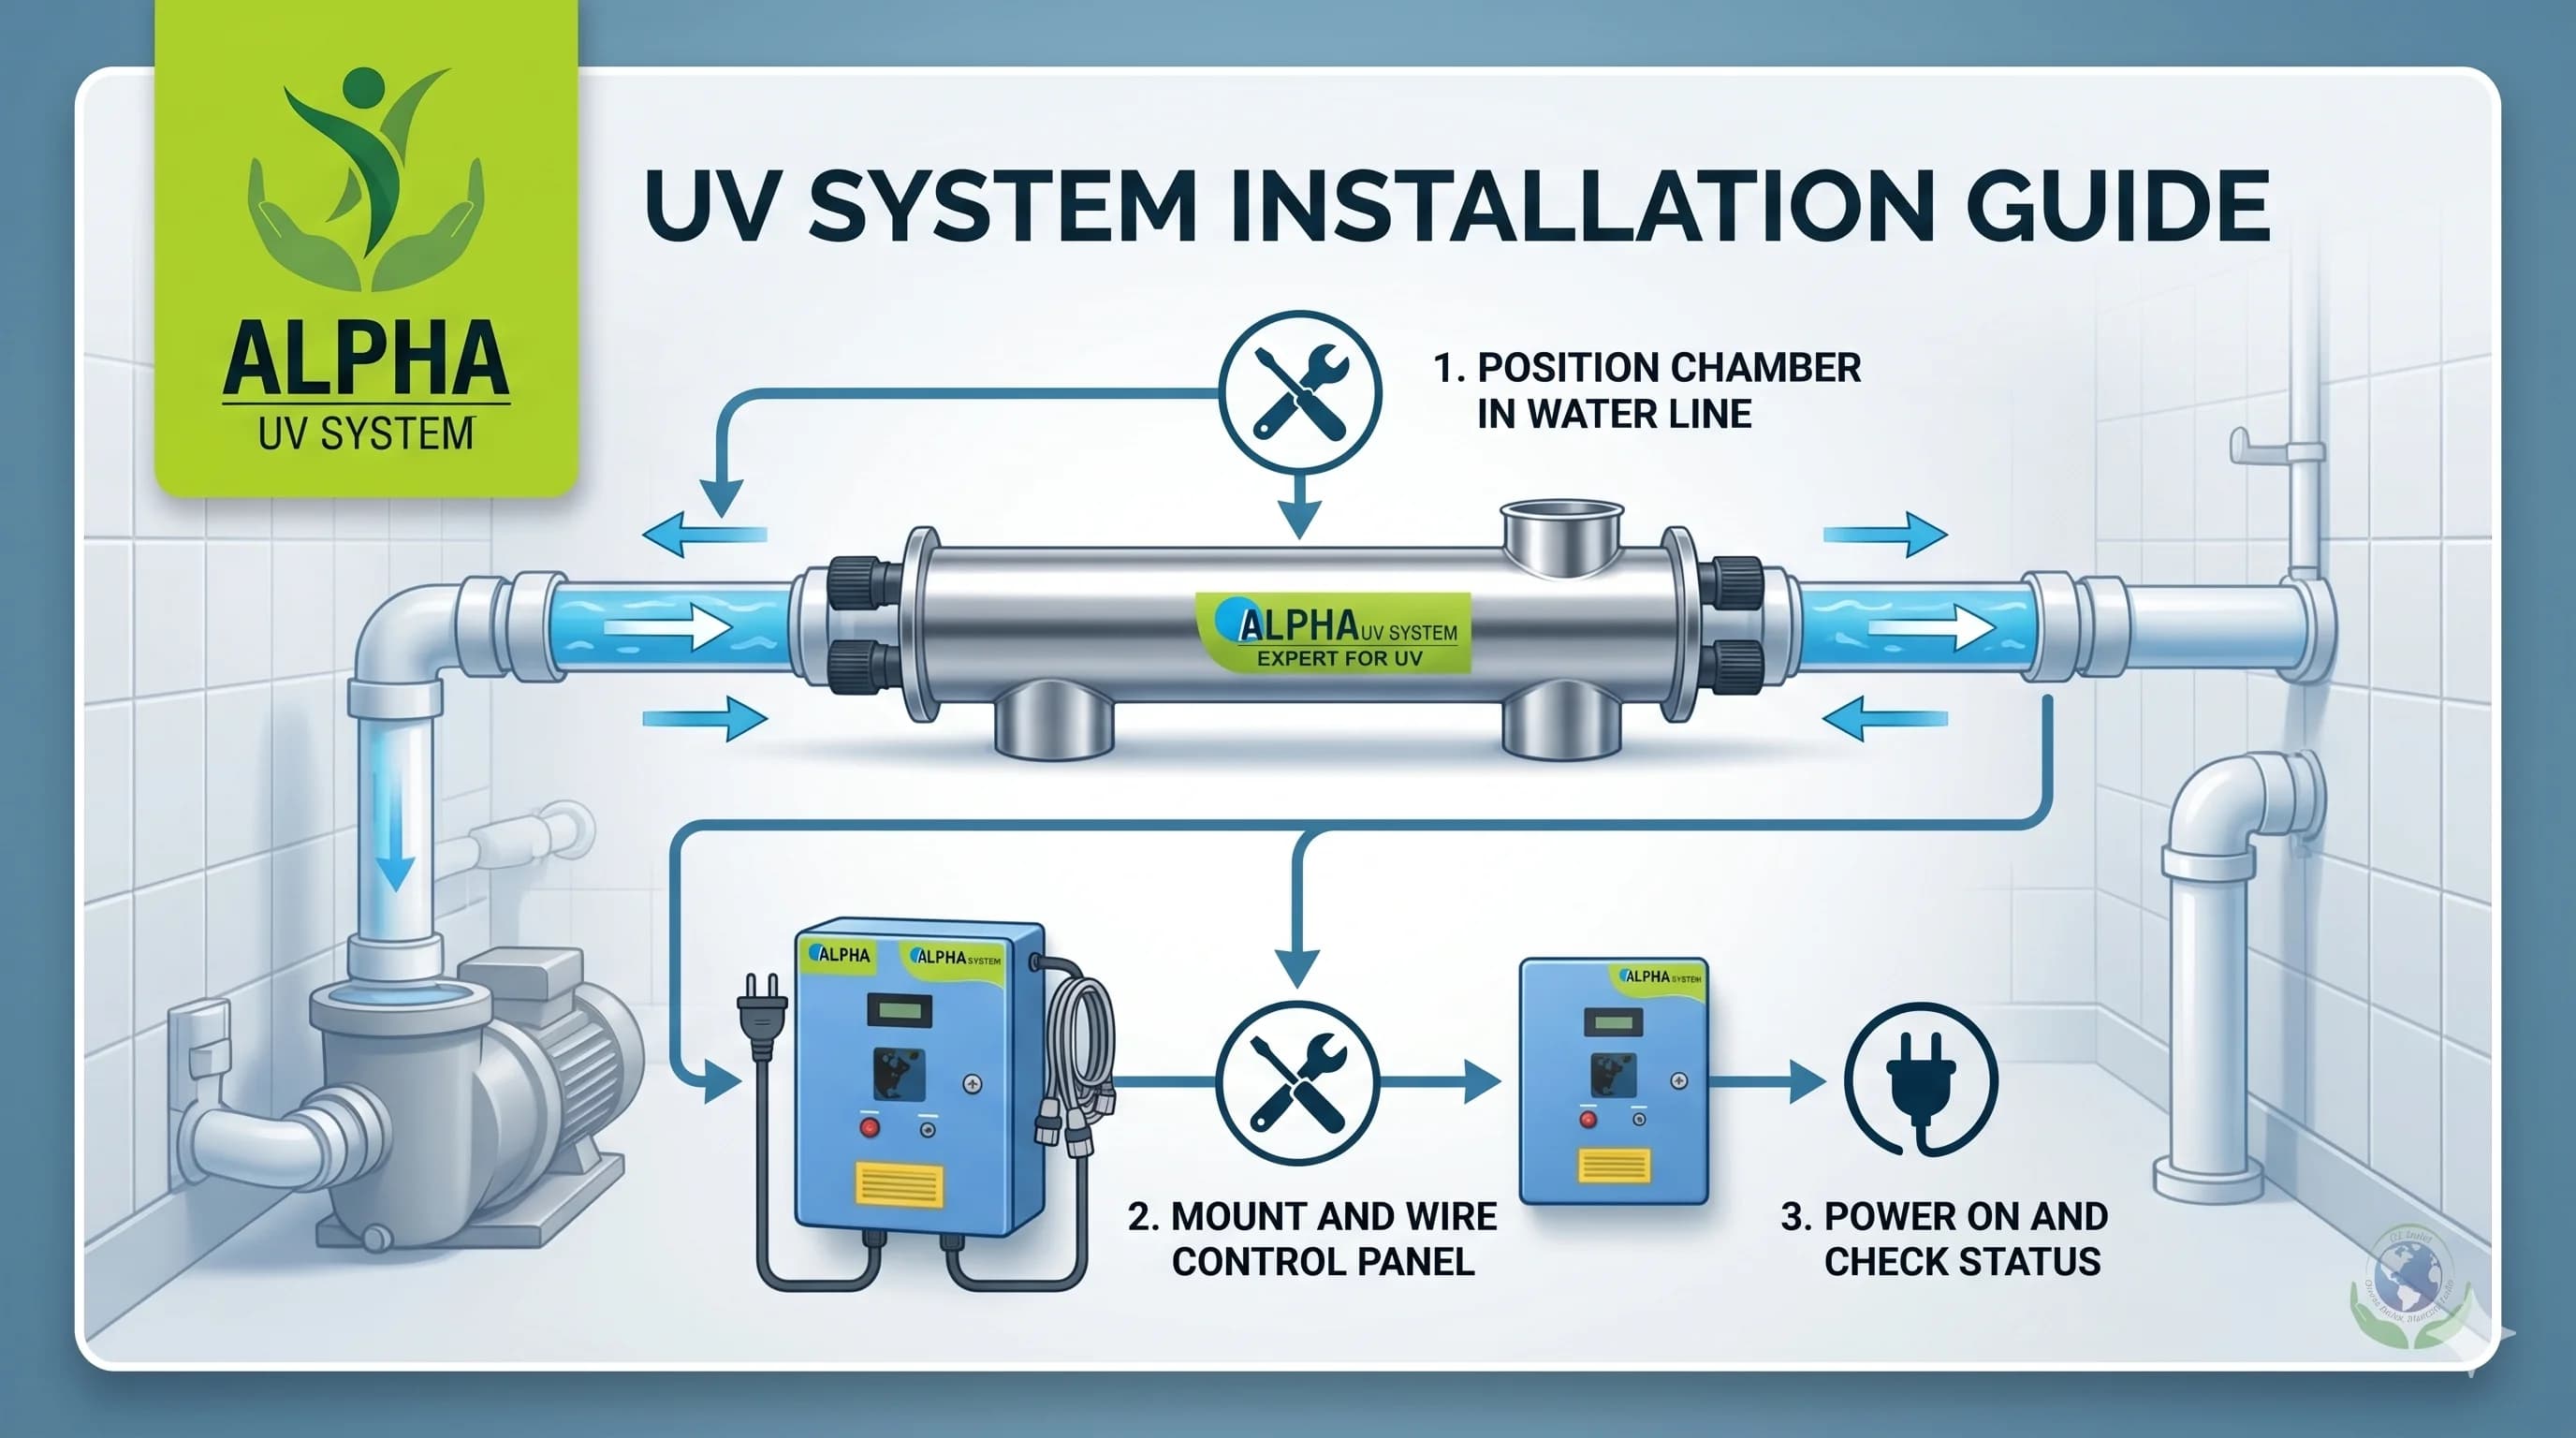
UV water system installation takes 30-60 minutes and requires no plumber for standard residential units. The correct sequence is: (1) select installation point after overhead tank outlet or under kitchen sink, (2) install 5-micron sediment pre-filter, (3) connect UV chamber inline with BSP threaded fittings and PTFE tape, (4) mount chamber vertically or horizontally per manufacturer guide, (5) connect to 230V power supply, (6) verify lamp indicator and check for leaks.
Installing a UV water purification system correctly determines whether your household or facility actually receives disinfected water — or merely passes water past an expensive lamp without adequate treatment. This UV water system installation guide India covers every stage from location selection to post-installation commissioning, with specific attention to Indian plumbing standards (BSP threads), overhead tank configurations, and FSSAI compliance documentation for commercial installations.
Choosing the Right Installation Point
The single most important rule in this UV water system installation guide India is: UV must always be the last treatment stage before the tap. Any tank, carbon filter, or distribution piping installed after the UV chamber creates conditions for bacterial regrowth, which completely defeats the purpose of UV disinfection.
Never install a UV system at the mains entry point before an overhead storage tank. The UV lamp will run continuously while water sits unused in the tank, bacteria will regrow in the tank and distribution pipes, and you will have wasted energy and lamp life without any safety benefit.
Best Installation Locations for Indian Homes
a) Under the kitchen sink (point-of-use) — the most common residential installation in India. The UV system treats only the water flowing to the kitchen/drinking tap. The UV lamp only energises when the tap is opened (on some models with flow switches) or runs continuously at low wattage. Ideal for apartments with limited access to the overhead tank outlet.
b) After the overhead tank outlet — treats all water distributed to every tap in the house. The overhead tank must then be cleaned at least every six months, as biofilm can still develop on tank walls even when outlet water is UV-treated. This configuration gives whole-house protection but the lamp runs continuously.
c) After the RO membrane — if your household has an RO system, the UV chamber must be installed after the RO membrane, never before. UV-C radiation degrades polyamide thin-film composite (TFC) RO membranes over time and reduces their rejection performance. RO permeate water is already low in turbidity, making it ideal for UV disinfection.
| Location | Covers | Advantage | Disadvantage |
|---|---|---|---|
| Under kitchen sink | Drinking/cooking tap only | UV runs only when needed | Other taps unprotected |
| After overhead tank outlet | All taps in house | Whole-house protection | Lamp runs 24/7; tank biofilm still possible |
| After RO membrane | Drinking tap only | Protects against post-RO bacteria | UV must be after RO, never before |
| At mains entry (NOT recommended) | All taps | Whole-house (apparent) | Lamp runs 24/7; tank re-contaminates water; unnecessary energy use |
What You Need Before Starting
Materials and Tools
Materials required:
- UV system with Philips UV-C lamp pre-installed (confirm before unpacking)
- 5-micron sediment pre-filter housing and polypropylene cartridge
- BSP male/female fittings — 1/2 inch or 3/4 inch depending on your supply pipe diameter
- PTFE thread seal tape (minimum one roll)
- Mounting bracket and screws (usually supplied with the UV system)
- Electrical cable tie or strain relief clip for power cable management
Tools required:
- Adjustable spanner or pipe wrench
- Screwdriver (Phillips and flathead)
- Drill and appropriate wall plugs for bracket mounting
- Bucket or towel to manage water during disconnection
Before you begin, verify:
- The main water supply stop cock can be closed completely
- A 230V earthed socket is available within 1.5 metres of the planned UV installation point
- The fittings supplied with your UV system match the BSP thread standard used in your building's plumbing
Indian plumbing note: Most residential and commercial plumbing in India uses BSP (British Standard Pipe) threads. BSP and NPT (National Pipe Thread, used in the USA) are not interchangeable — the thread form and taper angle differ. Using NPT fittings on BSP pipes will result in cross-threading and leaks. Confirm the fitting standard before purchasing additional fittings from a hardware supplier.
Step-by-Step Installation: Residential Under-Sink
This section of the UV water system installation guide India covers the most common residential configuration: a UV system installed under the kitchen sink on the drinking water tap line.
Step 1 — Shut Off the Water Supply
Close the stop cock located under the kitchen sink, or shut the main inlet valve if no under-sink stop cock is available. Once closed, open the kitchen tap to release remaining pressure in the line and drain any standing water from the pipe section where you will be working. Place a bucket or towel under the work area before disconnecting any pipe.
Step 2 — Install the Sediment Pre-Filter
Install the 5-micron sediment filter housing inline on the supply pipe, before the UV chamber inlet. The filter housing is directional — a flow direction arrow is moulded into the body. Water must enter the correct port or filtration will not occur. Apply PTFE tape to all male threads before assembly: wrap a minimum of three times in the direction of the thread (clockwise when viewed from the thread end), pulling the tape taut as you wrap. Tighten to finger-tight plus a quarter turn with the spanner. Do not over-tighten plastic filter housings — the body can crack, causing a slow leak that may not be immediately visible.
Leave adequate clearance below the filter housing for cartridge removal during routine maintenance. The housing bowl unscrews downward, and a stuck housing in a tight cabinet is a common maintenance complaint.
Step 3 — Install the UV Chamber
Attach the mounting bracket to the cabinet wall or under-sink panel using the supplied screws and wall plugs. The UV chamber can typically be installed horizontally or vertically — check your manufacturer's guide for any orientation restriction, as some flow-through designs require a specific orientation for even UV dose distribution. Mount the chamber in the bracket before connecting the plumbing to avoid stress on fittings during bracket installation.
Connect the chamber inlet (from the pre-filter outlet) and chamber outlet (to the tap) using BSP fittings and PTFE tape. Confirm the flow direction arrow on the UV chamber body points from inlet to outlet in the direction of water travel. A chamber installed backwards will still pass water but UV-C exposure time and dose distribution will be suboptimal, reducing disinfection effectiveness.
Step 4 — Electrical Connection
Route the ballast power cable from the UV controller to the nearest 230V earthed socket. A dedicated socket is preferred — do not use a multi-way extension lead as a permanent installation. Route the cable away from water supply pipes, maintaining a minimum clearance of 150 mm where cables run parallel to pipework. Secure the cable with cable ties to prevent it from drooping into any water that may collect under the sink. Do not switch the UV system on at this stage — wait until the plumbing is tested for leaks.
Step 5 — Restore Water Supply and Check for Leaks
Slowly open the stop cock — do not turn it to fully open immediately. Allow the system to pressurise gradually and visually inspect every fitting, the filter housing, and both UV chamber connections for drips or seepage. Wait five minutes at working pressure before declaring the installation leak-free. If any leak is observed, close the stop cock, dry the joint thoroughly, apply additional PTFE tape to the male thread, and retighten before re-pressurising. Never energise the UV system if any water leak is present near the electrical ballast or lamp cap.
Step 6 — Commission the UV System
Switch on the UV system at the socket. The lamp indicator LED should illuminate within 5 seconds. Allow 2 minutes for the Philips UV-C lamp to stabilise from a cold start before using the water — UV-C output from a cold lamp is lower than rated output during the first 60-90 seconds of operation. Run water through the tap for 2 minutes to flush assembly residue and any air from the chamber. If your unit is equipped with a UV intensity monitor, verify that the display shows above 20 mW/cm2. Record the installation date in a maintenance log or on the label provided with the UV system — this date determines your annual Philips UV-C lamp replacement schedule.
Overhead Tank Installation
Overhead tank UV installation is a common requirement in Indian homes, housing societies, and commercial buildings where a single UV system is expected to protect all taps on the distribution network. The UV chamber must be installed on the outlet pipe from the overhead tank — not on the inlet pipe that fills the tank from the borewell or municipal supply.
The reason is straightforward: if UV is installed on the tank inlet, all incoming water is treated but bacteria will regrow in the tank over hours and days, especially in warm Indian conditions where tank water temperatures can reach 40-45 degrees Celsius. If UV is installed on the tank outlet, all water leaving the tank is disinfected immediately before it reaches the distribution pipes and taps.
For overhead tank installations, include a solenoid valve interlock in the design. The solenoid valve is installed in series on the outlet pipe after the UV chamber. It is wired to the UV controller so that if UV power fails or the lamp fails, the solenoid closes automatically and prevents untreated water from reaching taps. This interlock is strongly recommended for any overhead tank installation supplying multiple users.
Even with a UV system on the tank outlet, clean the overhead tank every six months. Tank walls accumulate biofilm and sediment that UV does not remove. A dirty tank increases the turbidity of water entering the UV chamber and can reduce UV effectiveness over time.
Commercial UV System Installation
Commercial UV systems with capacities above 2,000 LPH typically require a licensed plumber for manifold connections and pipe work. This section of the UV water system installation guide India addresses the key differences from residential installation.
Pipe sizes: Commercial systems use larger BSP connection sizes — 1 inch, 1.5 inch, and 2 inch BSP are common for flow rates from 2,000 LPH to 20,000 LPH. Ensure matching fittings are sourced before the installation date. Flange connections are used on some high-flow industrial systems.
Parallel chamber installations: Where the required flow rate exceeds a single UV chamber's capacity, multiple chambers are installed in parallel with a balanced inlet manifold. Flow must divide equally between parallel units — uneven flow distribution results in some chambers receiving excessive flow (low UV dose) while others are underloaded. Use a symmetrical manifold design or install individual flow-regulating valves on each parallel branch.
Electrical requirements: Commercial UV systems above 55W often require a dedicated electrical circuit. Systems above 150W may require single-phase 230V with a higher-rated circuit breaker, or three-phase supply in large industrial installations. Consult a licensed electrician for commercial electrical work.
FSSAI compliance documentation: For food processing plants, packaged water units, and commercial kitchens operating under FSSAI licence, the UV installation must be documented for audit purposes. Photograph the completed installation showing the UV chamber position in the treatment train, and record the system model number, Philips TUV lamp brand and wattage, installation date, and initial commissioning flow rate. Keep these records for at least three years or as required by your FSSAI licence conditions.
Common Installation Mistakes and How to Avoid Them
| Mistake | Consequence | How to Avoid |
|---|---|---|
| UV installed before sediment pre-filter | Turbid water fouls quartz sleeve within weeks; UV dose drops sharply | Always install sediment pre-filter upstream of the UV chamber |
| UV installed before RO membrane | UV-C radiation degrades polyamide RO membrane; rejection performance drops | UV must always go after the RO membrane, never before |
| Flow direction reversed (chamber installed backwards) | Inadequate UV dose distribution; reduced disinfection effectiveness | Match the arrow on the chamber body to the water flow direction before connecting |
| NPT fittings used with BSP pipes | Cross-threading and persistent leaks; different thread form and taper angle | Confirm fitting thread standard (BSP vs NPT) before purchasing from hardware supplier |
| Carbon filter installed after UV | Carbon filter bed re-contaminates UV-treated water with bacteria | Carbon filter must always be installed before UV, not after |
| UV installed at mains entry before overhead tank | Tank re-contaminates treated water; lamp runs 24/7 without protecting end users | Install at tank outlet or at point of use under the kitchen sink |
| Chamber mounted without bracket (hanging on fittings) | Mechanical stress on pipe joints; eventual joint failure and leak | Always use the provided wall bracket to support the chamber independently of the pipe fittings |
Commissioning Checks After Installation
| Check | Method | Pass Condition | If Fail |
|---|---|---|---|
| Lamp on | Visual — indicator LED on controller | Green indicator illuminated within 5 seconds of power-on | Check power connection; check lamp pins are seated; replace Philips UV-C lamp if still no indication |
| No leaks at fittings | Visual inspection after water supply restored | No drips at any connection after 5 minutes at working pressure | Shut off supply, dry joint, apply additional PTFE tape, retighten |
| Flow rate within rated capacity | Bucket test: time to fill 10 litres; convert to LPH | Measured flow below UV system's rated maximum LPH | If flow exceeds rated LPH, install a larger UV system — do not operate above rated flow |
| UV intensity (if equipped) | UV intensity monitor display reading | Above 20 mW/cm2 | Clean quartz sleeve; check lamp age; replace Philips TUV lamp if over 8,000 hours |
| Water quality (optional at commissioning) | Lab coliform test on post-UV sample | Zero coliforms detected in post-UV sample | Investigate flow rate, quartz sleeve cleanliness, and lamp output if coliforms detected |
Maintenance After Installation
Following the steps in this UV water system installation guide India will result in a correctly installed system — but the system's long-term performance depends on a structured maintenance schedule. Indian summers place additional stress on water treatment components: high ambient temperatures accelerate biofilm growth in tanks and pre-filters, and increased water usage during summer months means higher lamp hours consumed.
- First 30 days: Inspect all fittings weekly for slow seepage. Thermal expansion during Indian summers (pipe temperatures can vary 20-30 degrees Celsius between seasons) can cause initially tight connections to develop minor weeps as materials expand and contract.
- Every 3 months: Replace the 5-micron sediment pre-filter cartridge. In areas with high turbidity, replace more frequently — a blocked pre-filter reduces flow rate and increases UV exposure time variability.
- Every 6 months: Inspect and clean the quartz sleeve. Dissolve 30 grams of citric acid in 1 litre of water, soak a clean cloth in this solution, and wipe the quartz sleeve carefully. Rinse with clean water before reinserting. Never use abrasive materials on the quartz surface.
- Annually: Replace the Philips UV-C lamp regardless of total operating hours. UV-C output degrades over time even when the lamp still glows visibly. For drinking water safety, annual lamp replacement is the industry standard in India. Do not extend the lamp replacement interval to save cost.
- Annual cost estimate: Maintenance for a residential UV system typically costs Rs. 1,200 to Rs. 3,000 per year depending on system size, covering one lamp replacement and four sediment cartridge changes.
Frequently Asked Questions
Do I need a plumber to install a UV water system?
For standard residential UV systems installed under the kitchen sink on 1/2 inch BSP supply pipes, no plumber is needed if you have basic familiarity with pipe fittings, PTFE tape, and stop cocks. The installation process described in this UV water system installation guide India can be completed by a homeowner in 30-60 minutes. For overhead tank outlet installations, commercial systems, or any installation requiring new pipe runs, a licensed plumber is recommended. Alpha UV System can connect you with installation support within 24-48 hours of your enquiry.
Can I install a UV system myself on a CPVC pipe?
Yes. CPVC (Chlorinated Polyvinyl Chloride) piping is commonly used in Indian residential plumbing and is compatible with UV system installation. CPVC pipes use BSP threaded fittings in most Indian applications. When connecting BSP fittings to CPVC, apply PTFE tape to the male thread and tighten carefully — CPVC threads are more sensitive to overtightening than metal threads. Do not use solvent cement on threaded joints; PTFE tape is the correct sealing method for threaded CPVC fittings.
Where exactly should I install the UV system in my home?
For a flat or apartment in an Indian urban setting, the under-kitchen-sink location is the most practical: it treats only the drinking and cooking tap, the UV lamp runs only during use, and access for annual lamp replacement is straightforward. If you want to protect all taps, install the UV system at the outlet of your overhead tank with a solenoid valve interlock. Never install UV before the overhead tank — the tank will re-contaminate treated water before it reaches your taps.
What electrical connection does a UV system need?
Residential UV systems in India require a standard 230V AC, 50Hz earthed (three-pin) socket. Most residential UV systems consume 11-25 watts. A dedicated socket is preferred but not always required for residential systems. Ensure the socket has an earth connection — UV system controllers are metal-encased and must be earthed for safety. Do not use two-pin adapters or unearthed sockets. Commercial systems above 55W may require a higher-rated circuit; consult an electrician before installation.
Can I install UV horizontally?
Most residential UV systems designed as closed-vessel flow-through units can be installed either horizontally or vertically. Check your specific system's installation manual — some designs specify a preferred orientation for optimal hydraulic flow and UV dose distribution. For systems with a UV intensity sensor, sensor positioning relative to the lamp can differ by orientation. When in doubt, vertical installation (with the lamp running horizontally inside the chamber) is the more common configuration in Indian residential and commercial installations.
What should I do if there is a leak after installation?
Close the stop cock or main water supply valve immediately. Do not switch off the UV system yet if it is energised and away from the leak. Dry the leaking joint with a cloth. Unscrew the fitting, remove existing PTFE tape completely, and apply fresh PTFE tape — a minimum of four wraps pulled taut in the thread direction. Retighten to finger-tight plus one quarter turn. Restore water supply slowly and check again. If the leak persists after two re-applications of PTFE tape, the fitting may be cross-threaded or the thread is damaged — replace the fitting. If the leak is at the UV chamber end cap (lamp access end), check that the O-ring is correctly seated in its groove before reassembling.
Need Installation Help?
Whether you are installing a UV system under the kitchen sink in a Delhi NCR apartment or setting up a commercial UV treatment train for FSSAI compliance, our team provides technical guidance within 24-48 hours. WhatsApp us your installation query and we will advise on location, fittings, and commissioning.
WhatsApp for Installation SupportStandards, authorities & further reading
External references used to inform this guide. Regulations evolve — check the latest revision on each authority's site before compliance decisions.
Recommended UV Systems
Alpha UV System products for this application — powered by genuine Philips UV-C lamps.
Commercial UV Water Purification System
500 – 5,000 LPH
HACCP-compliant UV water purification for hotels, restaurants, and offices
Industrial UV Water Treatment System
5,000 – 50,000 LPH
Schedule M 2025 and HACCP compliant UV for pharma, food & beverage, and process water
Not sure which system suits your application? WhatsApp our engineers for a free recommendation →
Related solutions
See how Alpha UV System applies this to your industry or city.
Need a UV system?
Talk to our UV engineers — WhatsApp for a quote in 2 hours, or browse the full catalog on IndiaMART.